
Sunbeam Iron Model GCBSM 423 Cord Replacement: A Comprehensive Guide
This guide expertly details replacing the cord on your Sunbeam GCBSM 423 iron, reviving your ironing experience! Various online resources,
like SMASHINGS Magazine, Techy Targets, and InfluencersGineWuld, offer step-by-step instructions and YouTube tutorials to confidently tackle this repair.
Embarking on the repair of your Sunbeam GCBSM 423 iron, specifically a cord replacement, is a surprisingly manageable task for many homeowners. Numerous online guides, such as those found on SMASHINGS Magazine and Techy Targets, demonstrate that restoring functionality doesn’t necessarily require a professional. This introduction serves as a starting point, acknowledging the frustration of a malfunctioning iron and offering a pathway to self-sufficiency.
A damaged cord is a frequently cited issue, often rendering an otherwise perfectly good iron unusable. Fortunately, replacing it is often simpler and more cost-effective than purchasing a new appliance. Resources like Oxford Magazine’s YouTube archives highlight the accessibility of this repair. This manual aims to demystify the process, providing clear, concise instructions. Before proceeding, it’s crucial to prioritize safety and gather the necessary tools, as outlined by InfluencersGineWuld, ensuring a successful and secure repair.
Why Replace the Cord? Common Issues & Safety
The necessity for a Sunbeam GCBSM 423 cord replacement typically arises from visible damage – fraying, cracking, or exposed wires. These issues, frequently discussed in online manuals like those from SMASHINGS Magazine and Techy Targets, pose significant safety risks. A compromised cord can lead to electrical shocks or even fires, making immediate action crucial. Beyond visible damage, intermittent heating or a complete lack of power are also indicators of a faulty cord.
Safety is paramount throughout this repair. Always disconnect the iron from the power outlet before commencing any work. Never attempt a repair with a damaged cord still plugged in. InfluencersGineWuld emphasizes gathering the correct tools beforehand. Improperly secured connections can create hazards. Following the instructions carefully, as detailed in available resources, minimizes risk and ensures a safe, functional repair, restoring your iron to reliable operation.

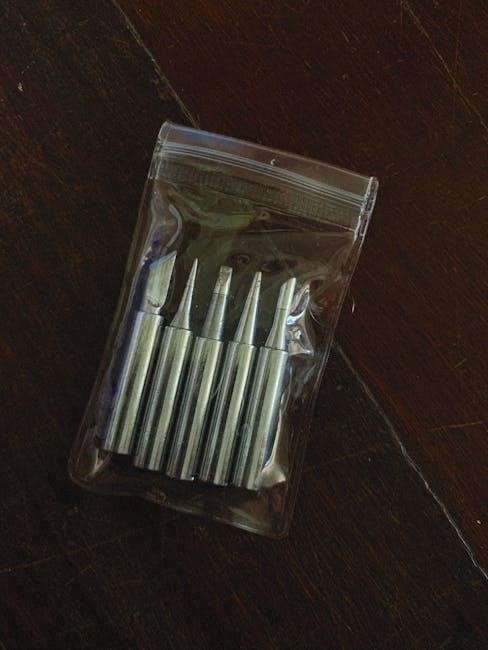
Tools and Materials Needed for Cord Replacement
Essential tools include screwdrivers, wire strippers, and electrical tape, as highlighted by InfluencersGineWuld. A compatible replacement cord is also vital for a successful repair!
Required Tools: Screwdrivers, Wire Strippers, Electrical Tape
Successfully replacing the cord on your Sunbeam GCBSM 423 iron hinges on having the right tools readily available. As multiple sources, including InfluencersGineWuld, emphasize, a screwdriver set is paramount. You’ll likely need both Phillips head and flathead screwdrivers to disassemble the iron’s housing and access the internal components.
Wire strippers are equally crucial for preparing the new cord for connection. These allow you to carefully remove the insulation from the wire ends without damaging the conductive core. Precision is key here to ensure a secure and reliable electrical connection. Finally, electrical tape is indispensable for insulating the exposed wire connections, preventing short circuits and ensuring user safety.
High-quality electrical tape is recommended for optimal insulation. Consider having a small pair of pliers on hand for manipulating wires within the tight confines of the iron’s interior. These three core tools – screwdrivers, wire strippers, and electrical tape – form the foundation for a safe and effective cord replacement.
Sourcing a Compatible Replacement Cord
Finding the correct replacement cord for your Sunbeam GCBSM 423 iron is vital for a safe and functional repair. A direct replacement cord specifically designed for this model is ideal, ensuring proper gauge and compatibility. However, if a direct replacement isn’t readily available, a cord with similar specifications can be used.
Pay close attention to the cord’s wire gauge (thickness) and length. The gauge must be sufficient to handle the iron’s power requirements, preventing overheating and potential fire hazards. Online retailers specializing in appliance parts are excellent sources. Carefully review product descriptions and specifications before purchasing.
Consider checking local hardware stores or appliance repair shops. When in doubt, consult with an appliance repair professional to confirm compatibility. Using an incompatible cord can damage the iron or create a safety risk, so prioritize accuracy and safety during this sourcing process.
Safety Precautions Before Starting the Repair
Prioritizing safety is paramount when undertaking a Sunbeam GCBSM 423 cord replacement. Always disconnect the iron from the power outlet before beginning any disassembly or repair work. Allow the iron to cool completely to avoid burns. Work in a well-lit, dry area, free from distractions.
Never attempt this repair if you are uncomfortable working with electrical components. If unsure, consult a qualified appliance repair technician. Ensure you have a clear understanding of the wiring diagram before disconnecting any wires. Use insulated tools to prevent accidental shorts.
Be mindful of potential electrical hazards. Properly insulate all connections with electrical tape to prevent shocks and sparks. Double-check all connections before reassembling the iron and testing its functionality. Ignoring these precautions could result in serious injury or damage to the appliance.
Step-by-Step Cord Replacement Procedure
Follow a systematic approach, starting with disassembly, removing the old cord, preparing the new one, and carefully connecting the wires. Secure connections and reassemble!
Step 1: Disassembling the Iron – Accessing the Cord Compartment
Begin by ensuring the iron is completely unplugged and cooled down – safety first! Locate the screw(s), typically found on the underside of the iron near the cord entry point. Carefully remove these screws using an appropriately sized screwdriver. Gently separate the iron’s housing halves; this may require a slight rocking motion, but avoid forcing anything.
Take note of the internal components and their positions as you disassemble – a quick photo can be helpful for reassembly. The cord compartment is usually located near the base, where the cord enters the iron. You may encounter additional clips or fasteners holding the housing together; carefully disengage these. Be mindful of any wires connected to the heating element or other internal parts, avoiding any accidental disconnections. Once the housing is open, you’ll have access to the cord’s connection points.
Step 2: Removing the Old, Damaged Cord
With the iron disassembled and the cord compartment accessible, carefully examine how the old cord is connected. Typically, the wires are attached to terminals via screws or push-on connectors. Before disconnecting anything, it’s wise to photograph the wiring configuration for accurate reassembly.
Loosen the terminal screws or gently release the push-on connectors to detach the wires from the old cord. If the wires are stubborn, avoid excessive force; a small flathead screwdriver can help release push-on connectors. Once disconnected, carefully pull the old cord out of the iron, noting its routing path. Inspect the cord’s exit point in the iron’s housing for any damage or wear. Dispose of the damaged cord safely, as it contains electrical components. Ensure all remnants of the old cord are removed from the compartment.
Step 3: Preparing the New Cord for Installation
Before connecting the new cord, ensure it’s the correct length and gauge for your Sunbeam GCBSM 423 iron. Using wire strippers, carefully remove approximately ½ inch of insulation from the ends of each wire in the new cord. Be cautious not to nick or damage the copper strands within.
Twist the exposed copper strands tightly to prevent fraying during connection. If the new cord has different colored wires than the original, carefully note their corresponding functions (hot, neutral, ground) based on your earlier photograph or the iron’s wiring diagram. Some cords may have pre-stripped and tinned wires, simplifying this step. Ensure the stripped wire is clean and free of any debris. Double-check the wire gauge matches the original cord for safe operation.
Step 4: Connecting the New Cord to the Iron’s Terminals
Carefully connect the prepared wires to the corresponding terminals inside the iron’s cord compartment. Refer to the photograph taken during disassembly or any available wiring diagrams to ensure correct placement. Typically, the hot wire (often black or red) connects to one terminal, the neutral wire (often white) to another, and the ground wire (often green or bare copper) to the grounding screw.
Ensure each wire is securely inserted into its terminal and that no bare wire is exposed outside the connection point. Tighten the terminal screws firmly, but avoid over-tightening, which could damage the terminals. A loose connection can cause arcing and a potential fire hazard. Double-check all connections before proceeding to the next step, verifying they match the original wiring configuration.
Step 5: Securing the Connections with Electrical Tape
After verifying all wire connections to the iron’s terminals, secure them meticulously with high-quality electrical tape. Wrap each terminal individually, ensuring complete coverage of the exposed metal and the base of the wire. Avoid overlapping the tape excessively, as this can create a bulky and less effective insulation layer.
Focus on creating a tight, secure wrap around each connection to prevent accidental shorts or contact with the iron’s internal components. Extend the tape slightly onto the insulation of the wires for added protection. Inspect each wrapped terminal to confirm there are no gaps or exposed metal areas. This step is crucial for safety, preventing electrical shocks and ensuring the iron functions correctly.

Reassembly and Testing
Carefully reassemble the iron’s housing, ensuring all parts align correctly. Then, test functionality on a low heat setting, progressing to higher temperatures for comprehensive evaluation.
Step 6: Reassembling the Iron Housing
With the new cord securely connected to the iron’s internal terminals, the next crucial step involves carefully reassembling the iron’s housing. Begin by aligning the two halves of the iron casing, ensuring that no wires are pinched or strained during the process. Pay close attention to any alignment tabs or grooves designed to ensure a proper fit – forcing the housing together can cause damage.
Secure the housing using the screws previously removed during disassembly. Tighten the screws gradually and evenly, avoiding over-tightening, which could strip the screw holes or crack the plastic casing. Double-check that all screws are firmly in place before proceeding. Before fully closing the housing, visually inspect the internal components one last time to confirm that the cord is correctly positioned and that no loose wires are present. A thorough visual inspection at this stage can prevent potential issues during testing.
Once satisfied with the internal arrangement, complete the reassembly by snapping or screwing the final parts of the housing into place. Ensure a snug and secure fit, leaving no gaps or openings. A properly reassembled housing is essential for both safety and functionality.
Step 7: Initial Functionality Test – Low Heat Setting
Before subjecting the iron to full power, a crucial initial test on the lowest heat setting is paramount. Plug the newly reassembled Sunbeam GCBSM 423 iron into a grounded electrical outlet. Select the lowest temperature setting and allow the iron a few minutes to begin heating up. Observe carefully for any unusual smells, sparks, or smoke – these indicate a potential wiring issue requiring immediate attention.
Gently touch the soleplate to assess if it’s gradually warming. It should heat up slowly and evenly. Avoid leaving the iron unattended during this initial test. If the iron heats up as expected without any concerning signs, proceed to a small, inconspicuous area of fabric to test its ironing capability. Ensure the fabric is appropriate for the low heat setting to prevent damage.
This initial low-heat test serves as a vital safety check, confirming the cord replacement was successful and the iron is functioning safely before increasing the temperature.
Step 8: Comprehensive Testing – All Heat Settings
Following the successful low-heat test, a thorough evaluation across all temperature settings is essential. Systematically increase the iron’s heat, starting with medium and progressing to the highest setting. At each level, allow sufficient time for the iron to reach its designated temperature. Continuously monitor for any anomalies – unusual odors, sparks, or inconsistent heating.
Test the iron on various fabric types appropriate for each heat setting, ensuring effective wrinkle removal without scorching or damage. Observe the soleplate’s responsiveness; it should maintain a consistent temperature without fluctuations. Pay close attention to the cord, checking for any overheating or signs of stress.
This comprehensive testing phase validates the complete functionality of the repaired Sunbeam GCBSM 423 iron, confirming a safe and effective ironing experience across its entire operational range. If any issues arise, immediately disconnect the iron and revisit the cord connection steps.

Troubleshooting Common Issues
If the iron fails to heat, recheck connections. Sparks or smells indicate wiring problems; discontinue use. A loose cord requires re-securing with electrical tape.
Problem 1: Iron Not Heating After Replacement

Experiencing a lack of heat after a cord replacement on your Sunbeam GCBSM 423 iron is a common frustration, but often easily resolved. First, double-check all wiring connections within the iron’s cord compartment. Ensure the new cord’s wires are securely fastened to the terminals – a loose connection is the primary culprit.
Verify the outlet you’re using is functioning correctly by testing it with another appliance. Inspect the new cord itself for any unseen damage incurred during installation, such as a pinched wire. If everything appears physically sound, consider a blown thermal fuse inside the iron, requiring further disassembly (exercise extreme caution!).
Resources like Techy Targets emphasize meticulous connection checks. Remember, safety first – always unplug the iron before any internal inspection. If you’re uncomfortable proceeding, consult a qualified appliance repair technician to avoid potential hazards.
Problem 2: Sparks or Electrical Smell During Use
Sparks or an electrical smell emanating from your Sunbeam GCBSM 423 iron post-cord replacement is a serious safety concern demanding immediate attention. Immediately unplug the iron and cease use. This indicates a short circuit, most likely stemming from improperly connected wires or damaged insulation;
Carefully re-examine all wiring connections within the iron, ensuring no bare wires are exposed and that wires aren’t touching each other or the iron’s chassis. Verify the electrical tape is securely and completely covering all exposed connections. A compromised cord itself could also be the source – inspect for cuts or abrasions.
Do not attempt further troubleshooting if you’re uncomfortable or unsure. Consult a qualified appliance repair technician; attempting to repair a short circuit yourself can be extremely dangerous. Resources emphasize safety – a faulty iron poses a fire hazard and risk of electric shock.
Problem 3: Cord Feels Loose or Unstable
If the replacement cord on your Sunbeam GCBSM 423 iron feels loose or unstable within the handle, it signifies an inadequate connection or insufficient securing. This is a potential safety hazard, as a disconnected cord can lead to intermittent power or, worse, a short circuit.
Carefully disassemble the handle again, focusing on the cord’s strain relief mechanism – the part that prevents the cord from being pulled out. Ensure this mechanism is properly engaged and securely holding the cord. Re-examine the terminal connections, verifying they are tightly fastened and the wires are firmly clamped.
Apply additional electrical tape to reinforce the cord’s entry point into the iron and within the handle. A snug fit is crucial. If the strain relief is damaged, it may require replacement. Prioritize a secure connection to prevent future issues and ensure safe operation.

Maintaining Your Sunbeam GCBSM 423 Iron
Regular cleaning and proper cord storage are vital for longevity. Inspect frequently for damage, ensuring continued safe and efficient ironing performance!
Proper Cord Storage to Prevent Damage
Protecting the cord is paramount to extending your Sunbeam GCBSM 423 iron’s lifespan and avoiding future replacements. Avoid tightly wrapping the cord around the iron itself, as this creates stress points and internal wire damage over time. Instead, loop the cord loosely and secure it with a cord tie or Velcro strap.
Never leave the iron with the cord dangling over the edge of a counter or table; this invites accidental pulls and abrasions. Store the iron in a cool, dry place, away from direct sunlight and extreme temperatures. Ensure the storage area is free from sharp objects that could puncture or cut the cord.
Regularly check the cord for any signs of wear and tear, such as cracks, fraying, or exposed wires. Addressing minor damage promptly can prevent more significant issues down the line. Proper storage habits, combined with routine inspections, will keep your iron functioning optimally for years to come.
Regular Cleaning and Inspection
Consistent maintenance is crucial for the longevity of your Sunbeam GCBSM 423 iron. Unplug the iron and allow it to cool completely before cleaning. Wipe the soleplate with a damp cloth to remove any residue buildup, avoiding abrasive cleaners that could scratch the surface. Inspect the cord meticulously for any signs of damage – cracks, fraying, or exposed wires are immediate red flags.
Check the cord’s connection points within the iron’s housing (when safe to access) for looseness or corrosion. Ensure the cord moves freely without any kinks or restrictions. Regularly examine the cord where it enters the iron’s handle, as this area is prone to stress.
A proactive approach to cleaning and inspection will identify potential problems early, preventing more costly repairs or the need for another cord replacement. Prioritize safety and address any concerns immediately.
Extending the Lifespan of Your Iron
Proper care significantly extends the life of your Sunbeam GCBSM 423 iron. Avoid leaving the iron unattended while heated, and always unplug it after each use. Empty the water reservoir completely after steaming to prevent mineral buildup, which can damage internal components. Use distilled water for steaming to minimize scale formation.
Store the iron upright on a stable, heat-resistant surface, ensuring the soleplate is protected from scratches. Avoid wrapping the cord tightly around the iron, as this can cause internal damage. Regularly clean the steam vents to maintain optimal performance.
Following these simple guidelines, alongside diligent cord inspection and replacement when needed, will ensure your Sunbeam iron remains a reliable part of your laundry routine for years to come.
Resources and Further Assistance
Explore official Sunbeam manuals and online video tutorials (YouTube Archives ‒ Oxford Magazine) for visual guidance on the GCBSM 423 cord replacement process!

Finding the Official Sunbeam Manual (If Available)
Locating the official Sunbeam manual for your GCBSM 423 iron is a crucial first step, though it can sometimes prove challenging. Sunbeam’s online resources aren’t always readily available for older models. However, a thorough search on the Sunbeam website (if still accessible) using the model number is recommended. Alternatively, explore dedicated appliance manual archives online – several websites specialize in hosting documentation for discontinued products.
These archives often require specific search terms, so try variations like “Sunbeam GCBSM 423 manual,” “Sunbeam iron repair guide,” or “Sunbeam ironing station instructions.” If a downloadable PDF isn’t found, some sites offer scanned copies or allow users to request manuals. Remember that the manual will provide detailed diagrams and safety instructions specific to your iron model, which are invaluable during the cord replacement process. Even if the manual doesn’t explicitly cover cord replacement, it will offer insights into the iron’s construction and disassembly procedures.

Online Video Tutorials for Visual Guidance
Visual learners will greatly benefit from the numerous online video tutorials available demonstrating the Sunbeam GCBSM 423 cord replacement process. YouTube is a prime resource, hosting several guides from DIY enthusiasts and repair professionals. Searching for “Sunbeam GCBSM 423 cord replacement” or “iron cord repair” will yield relevant results. These videos offer a step-by-step walkthrough, showcasing the disassembly, cord removal, and installation procedures in a clear, easy-to-follow format.
Pay close attention to the safety precautions highlighted in the videos, such as disconnecting the iron from power before starting and properly insulating electrical connections. Pause and rewind as needed to fully grasp each step. Complementing written guides with video tutorials provides a comprehensive understanding of the repair process, boosting confidence and minimizing errors. Remember to verify the video’s credibility and ensure it aligns with your iron model before proceeding.