
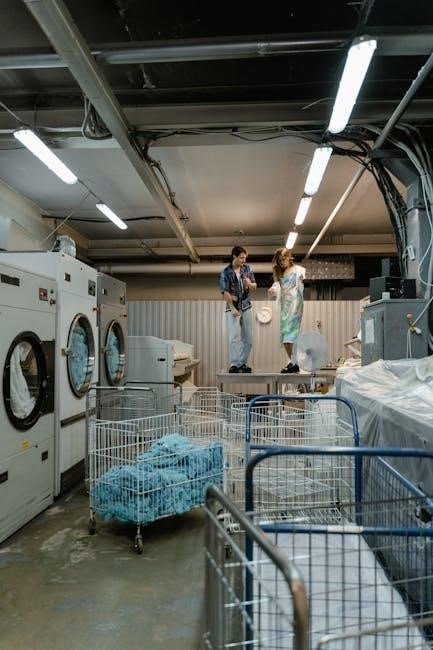
Kenmore 70 Series Dryer: A Comprehensive Guide
Welcome! This detailed resource provides essential information for owners of Kenmore 70 Series dryers, ensuring optimal performance and longevity of your appliance.
The Kenmore 70 Series represents a long-standing commitment to reliable and efficient laundry solutions. These dryers, manufactured by Whirlpool for Sears, have been a household staple for decades, known for their durability and performance. This series encompasses a range of models, offering various features and capacities to suit different family needs.
Understanding your Kenmore 70 Series dryer is crucial for maximizing its lifespan and ensuring safe operation. This guide aims to provide a comprehensive overview, covering everything from basic operation and maintenance to troubleshooting common issues. Whether you’re a first-time dryer owner or a seasoned pro, this resource will empower you to confidently handle your laundry needs.
We’ll delve into the specifics of identifying your model, understanding its controls, and performing essential upkeep. Proper care will not only extend the life of your dryer but also maintain its efficiency, saving you time and money.
Dryer Model Variations within the 70 Series
The Kenmore 70 Series isn’t a single dryer, but rather a family of models with diverse features. Variations primarily center around venting options – electric, gas, and even ventless models exist. Capacity also differs, ranging from compact dryers suitable for smaller spaces to larger capacity units for families.
Further distinctions include control types: some models feature simple dial controls, while others boast more advanced electronic touchpads with numerous cycle options. Features like moisture sensors, wrinkle shield, and steam cycles are present on select models, enhancing convenience and garment care.
Understanding these variations is key to finding information specific to your dryer. Model numbers, found on the appliance’s label, pinpoint the exact specifications and features. This guide will help you navigate these differences, but always refer to your specific model’s documentation for precise details.
Identifying Your Specific 70 Series Model Number

Locating your Kenmore 70 Series dryer’s model number is crucial for accessing accurate information, parts, and support. The model number is a unique identifier that specifies your dryer’s exact configuration and features. It’s typically found on a label located in one of several places:
Inside the dryer door: Often affixed to the door frame or the inside of the door itself.
On the back of the dryer: Look for a sticker or metal plate near the power cord connection.
Behind the access panel: Some models require removing a small access panel to view the label.
The model number is usually a combination of letters and numbers (e.g., 790.xxxxxxx). Record this number before proceeding, as it will be necessary when searching for parts, troubleshooting, or contacting customer support. Having the serial number handy is also beneficial.
Common Features Across 70 Series Models
Kenmore 70 Series dryers, while having variations, share several core features designed for convenience and efficient clothes care. Most models include multiple heat settings – typically high, medium, and low – to accommodate different fabric types. A moisture sensor is standard, automatically stopping the cycle when clothes are dry, preventing over-drying and saving energy.
You’ll generally find a range of preset cycles like delicate, permanent press, bulky/sheets, and timed dry. Many 70 Series dryers also offer features like wrinkle shield, which periodically tumbles clothes after the cycle ends to minimize wrinkles. Adjustable end-of-cycle signals are common, allowing you to customize the alert sound; Finally, most models feature a lint filter indicator, reminding you when it’s time to clean it.
Safety Precautions & Important Warnings
Prioritize safety! Before operating your Kenmore 70 Series dryer, carefully read all instructions. Never operate the dryer if it’s damaged, especially the power cord or plug. Disconnect the dryer from the power supply before cleaning or performing maintenance. Do not dry items that have been soaked in flammable liquids – risk of fire or explosion!
Keep the surrounding area clear of combustible materials. Always ensure the dryer vent is unobstructed to prevent overheating and fire hazards. Never allow children to operate the dryer unsupervised. Do not insert hands into the dryer during operation. Regularly inspect the lint filter and vent for buildup. Ignoring these warnings could result in serious injury or property damage.
Electrical Safety Guidelines

Crucially, your Kenmore 70 Series dryer requires a dedicated 240-volt electrical circuit. Do not share this circuit with other appliances. Ensure the voltage matches the dryer’s specifications – found on the model plate. A qualified electrician should perform the installation and any electrical repairs. Never attempt DIY electrical work!
Always ground the dryer properly to prevent electric shock. Inspect the power cord regularly for damage; replace it immediately if frayed or damaged. Avoid using extension cords or adapters. If the dryer experiences a power surge, disconnect it and have it inspected before reuse. Improper electrical connection can lead to fire, shock, or dryer malfunction. Prioritize a safe and correctly installed electrical setup.
Gas Dryer Specific Safety (If Applicable)
If you own a gas Kenmore 70 Series dryer, specific safety precautions are vital. Ensure proper ventilation to prevent carbon monoxide buildup – a potentially fatal hazard. A qualified gas technician must install and service the gas connection. Regularly inspect the gas supply line for leaks using a soapy water solution; never use a flame!
Do not store flammable materials near the dryer. If you smell gas, immediately shut off the gas supply, open windows, and evacuate the area. Never attempt to repair gas components yourself. The dryer’s burner assembly requires professional attention. Confirm the gas type (natural gas or propane) matches your supply. Proper gas connection and ventilation are paramount for safe operation.
Understanding Dryer Controls & Cycles
The Kenmore 70 Series dryer offers a variety of cycles designed to cater to different fabric types and drying needs. Familiarizing yourself with these settings ensures optimal garment care and prevents damage. Common cycles include Normal, Delicate, Timed Dry, and Bulky/Sheets. Each cycle adjusts heat levels and tumbling action for specific materials.
Moisture sensors automatically detect when clothes are dry, preventing over-drying and saving energy. Timed Dry allows you to set a specific drying duration. Explore options like Wrinkle Shield to minimize creases. Understanding the control panel – including buttons for cycle selection, temperature adjustments, and options – is key to maximizing your dryer’s functionality. Refer to the detailed cycle guide for specific recommendations.
Control Panel Overview – Buttons & Displays
The Kenmore 70 Series dryer’s control panel is designed for intuitive operation. Typically, you’ll find a cycle selector dial or buttons to choose from pre-set drying programs like Normal, Delicate, and Heavy Duty. Temperature settings – High, Medium, Low, and Air Dry – are usually selectable via buttons. A ‘Start’ button initiates the drying process, and a ‘Pause/Cancel’ button halts operation.

Digital displays show the remaining drying time, cycle status, and any error codes. Dedicated buttons often control options like Wrinkle Shield, Signal (to alert you when drying is complete), and Damp Dry. Some models feature a ‘My Cycle’ function for saving preferred settings. Understanding the indicator lights – such as ‘End of Cycle’ and ‘Lint Filter Clean’ – is crucial for safe and efficient dryer use.
Detailed Cycle Guide: What Each Setting Does
The ‘Normal’ cycle is ideal for everyday cottons and linens, utilizing medium-high heat for thorough drying. ‘Delicate’ employs low heat, protecting fragile fabrics like lingerie and synthetics. ‘Heavy Duty’ uses high heat and extended drying time for bulky items like towels and jeans. ‘Permanent Press’ offers medium heat and a cool-down phase to minimize wrinkles in synthetic blends.

‘Timed Dry’ allows you to set a specific drying duration, useful for small loads or damp items. ‘Air Dry’ provides no heat, ideal for refreshing clothes or drying items that shouldn’t be exposed to heat. Some models include specialized cycles like ‘Bulky/Bedding’ and ‘Sanitize’ for specific needs. Always consult the garment care label before selecting a cycle to prevent damage.
Basic Dryer Operation – Step-by-Step Instructions
First, ensure the dryer is plugged in or connected to a gas supply. Next, load your laundry, avoiding overfilling to allow proper tumbling. Close the dryer door securely. Select your desired cycle using the control panel, adjusting temperature settings as needed.
Press the ‘Start’ button to initiate the drying process. The dryer will automatically shut off when the cycle is complete. Once cooled, remove your clean, dry laundry promptly to prevent wrinkles. Remember to clean the lint filter after each load for optimal performance and safety. Always double-check pockets for any forgotten items before starting a cycle!
Loading the Dryer Correctly

Proper loading is crucial for efficient drying and preventing damage to your clothes and the dryer itself. Avoid overloading; clothes need room to tumble freely. A good rule of thumb is to fill the drum only about half to three-quarters full.
Separate items by fabric type and weight – heavier items like towels should be dried separately from lighter items like delicates. Ensure items are untangled before loading. Check pockets for objects! Close zippers and fasten hooks to prevent snagging. For best results, distribute the load evenly around the drum. Don’t pack items tightly, as this restricts airflow.
Adding Dryer Sheets & Fabric Softeners
Dryer sheets and liquid fabric softeners can reduce static cling and soften fabrics, but using them requires careful consideration. If using dryer sheets, add one sheet at the beginning of the drying cycle, before adding clothes. Do not handle or touch the dryer sheet after it has been used, as it contains residue.

Liquid fabric softener, if your Kenmore 70 Series dryer has a dispenser, should be added to the designated compartment before starting the cycle. Never pour liquid fabric softener directly onto clothes, as it can cause staining. Avoid using excessive amounts of either product, as buildup can reduce dryer efficiency and potentially clog vents.
Troubleshooting Common Dryer Issues
Encountering problems with your Kenmore 70 Series dryer? Don’t worry, many issues are easily resolved. This section addresses frequent concerns. If the dryer won’t start, check the power cord, circuit breaker, and door latch. For no-heat situations, verify the gas supply (if applicable) and heating element.
A drum that isn’t tumbling often indicates a broken belt or motor issue. Excessive noise could stem from foreign objects, worn bearings, or a failing drum support. Always disconnect power before attempting any internal inspection. If you’re uncomfortable diagnosing or repairing these issues, consult a qualified appliance technician for assistance and safety.
Dryer Not Starting
Is your Kenmore 70 Series dryer failing to power on? Several factors could be at play. First, ensure the dryer is properly plugged in and the power cord isn’t damaged. Next, check your home’s circuit breaker or fuse box – a tripped breaker or blown fuse will prevent operation. Verify the door is fully and securely latched; the dryer won’t start if the latch isn’t engaged.
If these basic checks don’t resolve the issue, the problem might lie with the thermal fuse, timer, or control board. Disconnect power before inspecting these components. Testing these parts requires a multimeter and some electrical knowledge; if you’re not comfortable, contact a qualified appliance repair technician for safe and accurate diagnosis.
Dryer Not Heating
Experiencing a Kenmore 70 Series dryer that runs but doesn’t produce heat? This is a common issue with several potential causes. Begin by checking the lint filter – a severely clogged filter restricts airflow and can trigger a safety shut-off. Next, inspect the vent hose; ensure it’s not crushed or blocked, as restricted venting also causes overheating and shut-down.

If the vent and filter are clear, the heating element, thermal fuse, or gas valve (for gas dryers) may be faulty. Always disconnect power before attempting any internal inspection. Testing these components requires a multimeter and understanding of electrical circuits. If you lack experience, it’s best to consult a professional appliance repair technician to avoid electrical hazards and ensure proper diagnosis.
Dryer Drum Not Tumbling
If your Kenmore 70 Series dryer is running, but the drum isn’t rotating, several issues could be at play. First, ensure you haven’t overloaded the dryer; excessive weight prevents proper tumbling. Check for obstructions – small items like socks can sometimes get lodged between the drum and the front or rear bulkheads.
If overloading isn’t the issue, the drive belt is a likely culprit. A broken or slipped belt will prevent drum rotation. Accessing the belt usually requires removing the front or rear panel (refer to your specific model’s service manual). Also, inspect the drum rollers and support wheels; worn or damaged rollers create friction and hinder movement. Always disconnect power before any internal inspection. If unsure, contact a qualified technician.
Excessive Noise During Operation
Unusual or excessive noise from your Kenmore 70 Series dryer often indicates a mechanical problem. A common cause is worn drum rollers or support wheels; these create squealing or grinding sounds as the drum rotates. Foreign objects – coins, buttons, or even small toys – trapped within the dryer housing can also generate rattling or banging noises.
Inspect the blower wheel for obstructions or damage, as this component can become quite loud when compromised. A failing drive motor or a worn drive belt can also produce noticeable noise. Always disconnect the power before attempting any internal inspection. If the noise persists after checking these areas, or if you’re uncomfortable disassembling the dryer, it’s best to consult a qualified appliance repair technician for diagnosis and repair.
Dryer Maintenance & Cleaning
Regular maintenance is crucial for maintaining the efficiency and safety of your Kenmore 70 Series dryer. Consistent cleaning prevents fires, extends the dryer’s lifespan, and ensures optimal performance. The most important task is cleaning the lint filter after every load – a clogged filter restricts airflow and poses a fire hazard.
Equally vital is cleaning the dryer vent at least annually, or more frequently if you notice longer drying times. A blocked vent forces the dryer to work harder, increasing energy consumption and risk. Periodically wipe down the dryer’s interior and exterior with a damp cloth. Avoid harsh chemicals or abrasive cleaners. Remember to inspect and clean around the drum as well, removing any accumulated lint or debris.
Cleaning the Lint Filter – Importance & Procedure
The lint filter is your dryer’s first line of defense against fire hazards and inefficient operation. A clogged filter restricts airflow, causing the dryer to overheat and work harder, increasing energy costs and potentially leading to a fire. Clean the lint filter after every single load.
To clean the filter, simply locate it – typically inside the dryer door or on top of the dryer cabinet. Remove the filter and gently roll off the accumulated lint with your fingers. For stubborn lint, a soft brush or vacuum cleaner attachment can be used. Ensure the filter is completely clean and dry before replacing it. Never operate the dryer without the lint filter in place! Inspect the filter housing for any lint buildup and clean as needed.
Cleaning the Dryer Vent – Preventing Fires
A clogged dryer vent is a significant fire hazard. Lint accumulates not only in the filter but also within the vent ductwork, restricting airflow and creating a combustible environment. Inspect and clean your dryer vent at least once a year, or more frequently if you notice longer drying times or the dryer feels excessively hot.
To clean the vent, disconnect the vent from both the dryer and the wall. Use a dryer vent cleaning kit – available at most hardware stores – or a long, flexible brush to remove lint buildup. Vacuum the vent thoroughly. Reconnect the vent securely, ensuring there are no kinks or obstructions. Rigid metal venting is preferred over flexible plastic or foil venting, as it’s less prone to lint accumulation and damage. Regular vent cleaning dramatically reduces fire risk.
Cleaning the Dryer Interior & Exterior
Maintaining a clean dryer interior and exterior contributes to its efficiency and lifespan. Begin by unplugging the dryer from the power outlet. Wipe down the exterior surfaces – including the top, sides, and control panel – with a damp cloth and mild detergent. Avoid abrasive cleaners that could scratch the finish.
Inside the dryer, after cleaning the lint filter, use a damp cloth to wipe down the drum. For stubborn stains, a paste of baking soda and water can be effective. Never use harsh chemicals or solvents inside the dryer. Pay attention to the door seal, removing any accumulated lint or debris. Ensure the area around the dryer is also kept clean and free of obstructions for proper ventilation. A clean dryer operates more efficiently and safely.
Parts Replacement & Repair Resources
When your Kenmore 70 Series dryer requires parts replacement, several resources are available. Online retailers specializing in appliance parts, such as Sears PartsDirect and Amazon, offer a wide selection of components. Always have your specific model number handy to ensure compatibility. Local appliance parts stores can also provide assistance and often have parts in stock.
For DIY repairs, numerous online videos and forums offer guidance. However, complex repairs involving gas or electrical components should be left to qualified technicians. Kenmore’s official website may also list authorized service providers in your area. Remember to disconnect the power before attempting any repairs. Prioritize safety and consult professional help when needed to avoid further damage or injury.
Finding Replacement Parts Online
Locating replacement parts for your Kenmore 70 Series dryer online is generally straightforward. Sears PartsDirect (searspartsdirect.com) is a primary source, offering a comprehensive catalog specifically tailored for Kenmore appliances. Amazon and eBay are also viable options, but verifying seller ratings and part compatibility is crucial.
When searching, your dryer’s precise model number is essential. Inputting this number ensures you receive the correct component. Look for detailed part descriptions, diagrams, and customer reviews. Compare prices across different websites. Always check the return policy before purchasing. Many sites offer parts lookup tools based on your model, simplifying the process and minimizing errors. Shipping costs and estimated delivery times should also be considered.
When to Call a Professional Repair Technician
While many dryer issues are DIY-fixable, certain situations necessitate professional intervention. If you encounter gas leaks (for gas dryers), immediately shut off the gas supply and contact a qualified technician. Similarly, any electrical sparking or burning smells require immediate professional attention – do not attempt self-repair.
Complex repairs, such as replacing the heating element, gas valve, or electronic control board, are best left to experts. If you’ve attempted basic troubleshooting without success, or if the dryer displays error codes you don’t understand, a technician can accurately diagnose and resolve the problem. Attempting advanced repairs without proper knowledge can be dangerous and void your warranty. Prioritize safety and seek professional help when needed.