Singer Esteem II Sewing Machine Manual: A Comprehensive Guide
SINGER provides machines for all skill levels, from basic mending to complex quilting; this manual guides you through the Esteem II’s features and operation.
The Singer Esteem II is a versatile sewing machine designed to cater to a wide range of sewing projects, from simple alterations to more ambitious creations. It represents SINGER’s commitment to providing reliable and user-friendly machines for both beginners and experienced sewists. This model balances affordability with functionality, offering a solid set of features without overwhelming complexity.
Whether you’re embarking on garment construction, quilting endeavors, or basic household repairs, the Esteem II aims to deliver consistent performance. Its design prioritizes ease of use, making it an excellent choice for those new to sewing or seeking a dependable machine for everyday tasks. Understanding its capabilities through this manual will unlock its full potential, ensuring enjoyable and successful sewing experiences.
Understanding the Machine’s Features
The Singer Esteem II boasts a selection of built-in stitch patterns, providing versatility for diverse projects. These typically include straight, zigzag, and decorative stitches, allowing for both functional seams and embellishments. Adjustments for stitch length and width offer customization to suit fabric types and desired aesthetics.
A key feature is its user-friendly design, often incorporating simple controls for easy operation. Many models include a top-loading drop-in bobbin system for convenient threading. The machine’s construction emphasizes durability, ensuring reliable performance over time. Exploring these features within this manual will empower you to maximize the Esteem II’s capabilities and achieve professional-looking results.

Machine Setup and Preparation
Proper setup is crucial for optimal performance. This section details powering on, bobbin winding, threading, and bobbin insertion for your Singer Esteem II.
Initial Setup: Powering On and Basic Checks
Before commencing any sewing project with your Singer Esteem II, ensure the machine is correctly set up. Begin by connecting the power cord to a grounded electrical outlet. Verify the power switch is in the ‘Off’ position before plugging in the machine for safety.
Once connected, switch the machine ‘On’. Inspect all components visually. Confirm the handwheel turns freely without resistance, indicating no internal obstructions. Check that the presser foot is correctly positioned and lowered before attempting to sew.
Also, ensure the bobbin cover is securely in place. A quick visual inspection of the needle will confirm it’s properly inserted and of the correct type for your fabric. These initial checks guarantee a smooth and safe sewing experience with your Singer Esteem II.
Winding the Bobbin
Proper bobbin winding is crucial for consistent stitch quality on your Singer Esteem II. Place a spool of thread onto the spool pin, securing it with the spool cap. Guide the thread through the thread guide, then onto the bobbin.
Position the bobbin onto the bobbin winder spindle, ensuring it clicks into place. Push the bobbin winder to the right to engage it. Gently press the foot pedal to start winding; the machine will automatically stop when full.
Remove the bobbin, trim the thread, and ensure it winds evenly. An unevenly wound bobbin can cause tension issues. Always use Singer-approved bobbins for optimal performance and to avoid damaging your machine.
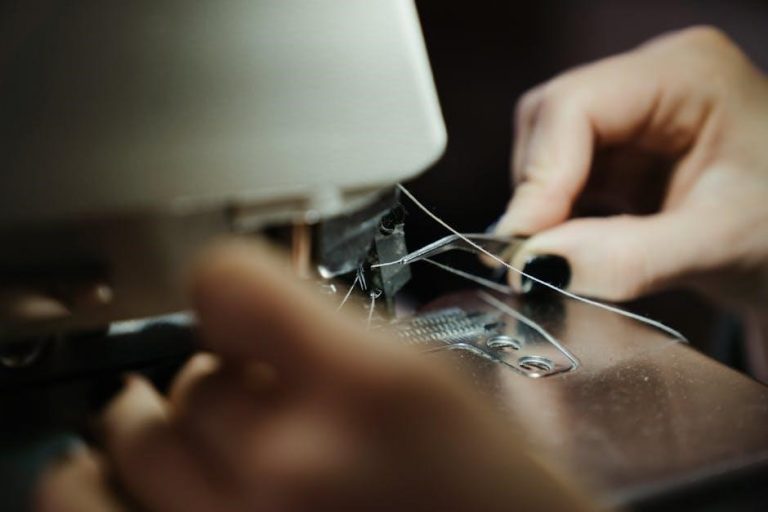
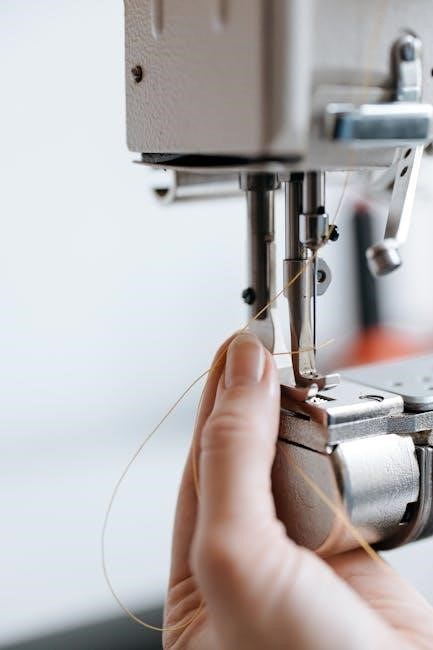
Threading the Upper Thread
Correct upper threading is essential for smooth sewing with your Singer Esteem II. Begin by raising the presser foot; this opens the tension discs. Place the spool of thread on the spool pin and secure it with the cap.
Guide the thread through the first thread guide, then down and around the tension discs. Continue threading through the take-up lever, ensuring it’s in its highest position. Next, thread through the needle clamp and finally, thread the needle from front to back.
Pull a few inches of thread through the needle eye. Incorrect threading can lead to skipped stitches or thread breakage. Refer to the diagrams in your manual for visual guidance.
Inserting the Bobbin
Proper bobbin insertion is crucial for consistent stitch formation on your Singer Esteem II. Open the bobbin cover located underneath the needle plate. Gently insert the wound bobbin into the bobbin case, ensuring it rotates freely and clicks into place.
Draw up a few inches of thread through the slot in the bobbin case. This is often done by holding the bobbin thread and gently turning the handwheel towards you.
Ensure the bobbin thread flows smoothly. Incorrect bobbin insertion can cause tension issues and poor stitch quality. Always consult the manual’s diagrams for precise instructions.
Basic Sewing Operations
Mastering fundamental techniques like stitch selection, length adjustment, and straight/zigzag stitching unlocks the Singer Esteem II’s full potential for various projects.
Selecting Stitch Patterns
The Singer Esteem II boasts a variety of built-in stitch patterns, catering to diverse sewing needs. To select a stitch, locate the stitch selection dial – typically positioned prominently on the machine’s front panel. This dial features a chart illustrating each available stitch.
Rotate the dial until the desired stitch number or symbol aligns with the indicator mark. Ensure the machine is turned on to visually confirm the selected stitch on the stitch preview area, if equipped. Common stitches include straight stitch for general sewing, zigzag for finishing edges and stretch fabrics, and decorative stitches for embellishment.
Experiment with different stitch patterns to achieve varied effects and enhance your sewing projects. Refer to the stitch guide within the manual for specific applications of each stitch.
Adjusting Stitch Length and Width
Precise control over stitch length and width is crucial for achieving professional-looking results with your Singer Esteem II. Locate the stitch length dial, usually marked with measurements in millimeters. Rotating this dial adjusts the length of each stitch – shorter for delicate fabrics, longer for heavier materials.
Similarly, the stitch width dial controls the breadth of zigzag and decorative stitches. Increasing the width creates a wider stitch, ideal for reinforcing seams or creating bold designs; Always test stitch settings on a scrap fabric before starting your project.
Refer to the manual’s stitch guide for recommended settings based on fabric type and desired effect.
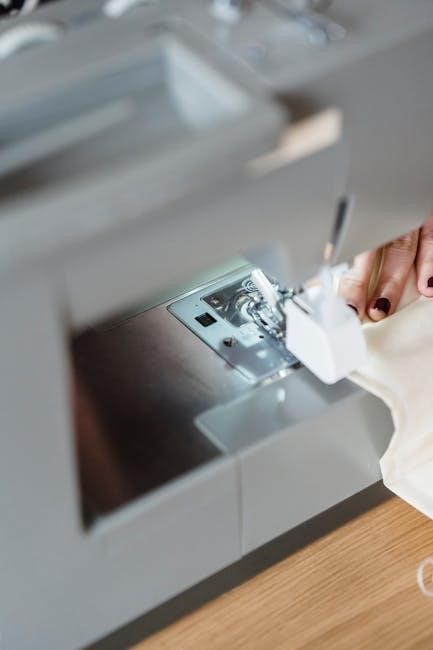
Straight Stitching Techniques
Mastering the straight stitch is fundamental to sewing with your Singer Esteem II. Begin by selecting the straight stitch option on the stitch selector dial. Ensure your fabric is aligned with the seam guide on the needle plate for accurate sewing. Maintain a consistent sewing speed, allowing the machine to feed the fabric smoothly.
Gently guide the fabric; avoid pulling or pushing, as this can distort the seam. Use the presser foot to maintain even pressure. For longer seams, lift the presser foot between sections to pivot the fabric easily.
Practice on scrap fabric to develop a consistent rhythm and achieve neat, even stitches.
Zigzag Stitching Applications
The Singer Esteem II’s zigzag stitch offers versatility beyond basic seams. Utilize it to finish raw edges, preventing fabric fraying and creating a professional look. Adjust stitch width for varying degrees of coverage; a narrower zigzag is ideal for lightweight fabrics, while wider settings suit heavier materials.
Zigzag stitches excel in stretch fabrics, allowing seam give without breakage. Employ it for decorative purposes, creating unique patterns and embellishments. Experiment with different stitch lengths and widths to achieve desired effects.
Remember to test on scrap fabric before applying to your project!

Advanced Sewing Techniques
Singer Esteem II unlocks creativity with buttonholes, zippers, overcasting, and appliqué; mastering these techniques elevates your sewing projects significantly.
Buttonhole Creation
The Singer Esteem II simplifies buttonhole creation with its dedicated buttonhole foot and pre-programmed stitch settings. Begin by attaching the buttonhole foot to your machine. Select the appropriate buttonhole stitch on the stitch selector dial, referencing your manual for specific stitch numbers.
Measure the diameter of your button and adjust the buttonhole length setting accordingly using the length control dial. Place the button under the presser foot, aligning it with the designated markings. Gently lower the presser foot and begin sewing, allowing the machine to automatically create the buttonhole outline.
Typically, the machine will stop automatically at each corner, prompting you to rotate the fabric. Follow the machine’s prompts to complete the buttonhole. Carefully remove the fabric and snip the buttonhole open, avoiding cutting into the stitching. Practice on scrap fabric to perfect your technique before working on your final project.
Zipper Insertion
The Singer Esteem II offers a streamlined process for inserting zippers, utilizing the zipper foot for precision. Attach the zipper foot to your machine; it allows sewing close to the zipper teeth. Position the zipper face down, aligning the zipper teeth with the desired seam line on your fabric.
Select a straight stitch and begin sewing close to one side of the zipper teeth, using the zipper foot as a guide. Repeat on the other side of the zipper, ensuring consistent stitching. For lapped zippers, fold the fabric over the zipper tape and stitch along the folded edge.
Practice on scrap fabric to achieve a neat and professional finish. Remember to backstitch at the beginning and end of each seam to secure the zipper in place. Proper tension adjustment is crucial for smooth zipper insertion.
Overcasting and Finishing Seams
The Singer Esteem II provides several options for neat seam finishing, preventing fraying and enhancing garment durability. Utilize the zigzag stitch to overcast raw edges, effectively encasing the fabric fibers. Adjust the stitch width to achieve desired coverage; a wider stitch provides more substantial protection.
Alternatively, employ a serger foot (if compatible) for a professional overlock finish. This creates a clean, looped edge that’s both functional and aesthetically pleasing. For lighter fabrics, a rolled hem foot can create a delicate, finished edge.
Proper tension is vital for consistent overcasting. Always test on scrap fabric before applying to your project. Consider using seam sealant for extra fray prevention, especially on delicate materials.
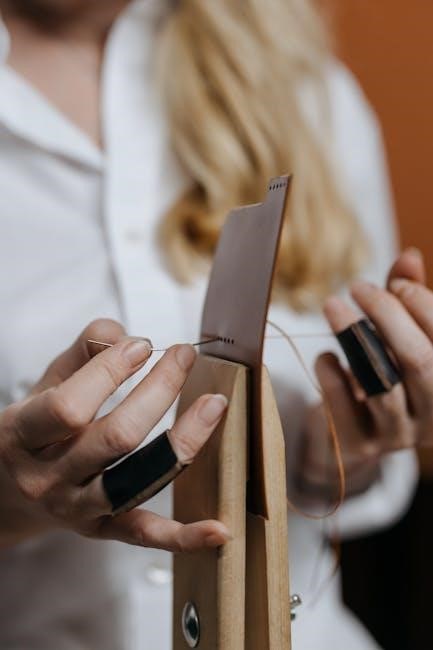
Applique Sewing
The Singer Esteem II excels at applique, allowing for creative fabric embellishment. Begin by positioning your applique shape onto the base fabric, securing it with pins or temporary adhesive. Select a suitable stitch – a satin stitch provides a dense, decorative edge, while a zigzag stitch offers a more textured look.
Reduce the presser foot pressure slightly to prevent fabric shifting. Slow sewing speed is crucial for precise control; Consider using a stabilizer on the back of the applique fabric to prevent distortion.
Experiment with different thread colors and stitch densities to achieve varied effects. Carefully trim excess fabric from the applique after stitching for a polished finish.

Maintenance and Troubleshooting
Regular cleaning and oiling ensure optimal performance of your Singer Esteem II; this section details solutions for common issues like thread breaks and tension problems.
Cleaning the Machine
Maintaining a clean sewing machine is crucial for smooth operation and longevity of your Singer Esteem II. Before any cleaning, always disconnect the power cord to prevent accidental operation. Begin by removing the needle, presser foot, and bobbin case. Use a soft brush – often included with your machine – to remove lint and dust from the bobbin area, feed dogs, and around the needle plate.
For more stubborn lint, a vacuum cleaner with a brush attachment can be helpful. Avoid using compressed air, as it can blow dust into sensitive areas. Wipe down the exterior of the machine with a slightly damp cloth. Never use abrasive cleaners or solvents, as these can damage the finish. Pay particular attention to areas where oil may accumulate. Regular cleaning, ideally after each use, will keep your Singer Esteem II running efficiently.
Oil Points and Lubrication
Proper lubrication is essential for the smooth functioning of your Singer Esteem II sewing machine. Refer to your machine’s diagram to identify specific oil points – typically located around the bobbin area, shuttle hook, and motor components. Use only SINGER recommended sewing machine oil; other oils can cause build-up and damage.
Apply a small drop of oil to each point, ensuring it penetrates moving parts. Avoid over-oiling, as excess oil can attract lint and create a sticky residue. After oiling, operate the machine slowly for a few minutes to distribute the lubricant. Regular oiling, as outlined in the manual, prevents friction and wear, extending the life of your machine. Always disconnect the power before lubricating.
Troubleshooting Common Issues: Thread Breakage
Frequent thread breakage on your Singer Esteem II can stem from several causes. First, ensure you’re using the correct thread type and size for your fabric. Re-thread the machine completely, verifying the thread is properly seated in the tension discs and guides. Check the needle – a bent or dull needle is a common culprit; replace it with a new, appropriate needle for your fabric.
Inspect the bobbin for proper winding and insertion. Incorrect tension settings can also cause breaks; adjust the upper tension dial incrementally. Finally, lint build-up in the thread path can interfere with smooth thread flow – clean the machine thoroughly.
Troubleshooting Common Issues: Needle Problems
Needle issues with your Singer Esteem II often manifest as broken needles, skipped stitches, or difficulty penetrating fabric. Always ensure you’re using the correct needle type and size for the fabric weight. A dull or bent needle should be replaced immediately to prevent further damage. Verify the needle is fully inserted into the needle clamp and securely tightened.
Incorrect threading can also cause needle problems; re-thread the machine carefully. If the needle continues to break, check the presser foot pressure – too much pressure can strain the needle. Finally, ensure the bobbin is correctly inserted and the timing is accurate.
Troubleshooting Common Issues: Tension Issues
Tension problems on your Singer Esteem II typically result in looping stitches, puckering fabric, or thread breakage. Begin by re-threading both the upper and lower threads, ensuring proper routing through all tension discs. Adjust the upper tension dial incrementally, testing on a scrap fabric after each adjustment.
Incorrect bobbin winding or insertion can also cause tension imbalances; rewind the bobbin evenly and confirm it’s seated correctly. Different fabric types require different tension settings, so experiment to find the optimal setting. If issues persist, clean the tension discs to remove lint or debris.

Specific Model Variations & Accessories
Singer Esteem II models may have slight variations; compatible presser feet and optional accessories enhance functionality, expanding your sewing capabilities significantly.
Singer Esteem II Model Differences
While fundamentally the Singer Esteem II shares core features, subtle variations exist between production runs and regional models. These differences primarily concern cosmetic elements like color schemes – some units feature a lighter casing than others – and minor adjustments to pre-programmed stitch patterns.
Internally, the mechanical components remain largely consistent, ensuring reliable performance across all versions. However, accessory bundles included with the machine can differ significantly depending on the retailer and country of purchase. Some models might include additional presser feet, needle assortments, or specialized tools not found in others.
Always refer to the specific model number printed on your machine’s chassis to identify its exact configuration and ensure compatibility with replacement parts or accessories. Checking the original packaging or sales receipt can also clarify included items.
Compatible Presser Feet
The Singer Esteem II utilizes a standard snap-on presser foot system, offering compatibility with a wide range of SINGER accessories. Essential feet include the all-purpose foot for everyday sewing, a zipper foot for precise zipper insertion, and a buttonhole foot for creating consistent buttonholes.
For more specialized projects, consider a satin stitch foot for decorative stitching, a blind hem foot for invisible hems, and a gathering foot for creating ruffles. Quilters will benefit from a ¼ inch foot for accurate seam allowances.
Ensure the presser foot clicks securely into place before beginning any sewing operation. Using the correct foot significantly improves stitch quality and project outcome.
Optional Accessories and Their Uses
Enhance your Singer Esteem II’s capabilities with optional accessories! An embroidery hoop transforms the machine for freehand embroidery, while a darning plate aids in repairing delicate fabrics. A walking foot ensures even fabric feeding, ideal for quilting or multiple layers.
Consider a seam ripper for correcting mistakes, a needle threader for ease of threading, and a lint brush for machine maintenance. A variety of presser feet, like the edge stitching foot or rolled hem foot, expand project possibilities.
These accessories boost creativity and efficiency, allowing you to tackle diverse sewing tasks with greater precision and enjoyment.

Safety Precautions
Always disconnect the power when not in use or servicing. Keep fingers away from the needle, and never sew over pins – prioritize safe operation!
General Safety Guidelines
Prioritize your safety while operating the Singer Esteem II. Always read the entire manual before use to understand all functions and potential hazards. Keep the machine in a well-lit and ventilated area, free from clutter. Never leave the machine unattended while it’s powered on.
Ensure children and pets are kept a safe distance from the sewing machine during operation. Avoid wearing loose clothing or jewelry that could become entangled in the moving parts. Always use the correct needle and accessories for your fabric type.
Inspect the machine regularly for any damage, and do not operate if parts are broken or missing. Disconnect the power cord before changing the needle, threading, or performing any maintenance. Never attempt to repair the machine yourself; contact a qualified technician for assistance. Safe sewing practices ensure enjoyable and productive crafting!
Electrical Safety
Always ensure the Singer Esteem II is properly grounded to prevent electric shock. Only connect the machine to a power outlet that matches the voltage specified on the machine’s label. Never operate the machine with a damaged power cord or plug; replace them immediately. Avoid using extension cords if possible, and if necessary, use a heavy-duty cord rated for the machine’s amperage.
Keep the power cord away from heat, oil, and sharp edges. Do not immerse the machine, power cord, or plug in water or other liquids. Always unplug the machine before cleaning or performing any maintenance.
Never attempt to open the machine’s casing or tamper with the internal electrical components. If the machine malfunctions or emits smoke, disconnect it immediately and contact a qualified technician. Prioritizing electrical safety is crucial for preventing accidents and ensuring long-term machine functionality.

Resources and Support
SINGER offers online manuals, warranty claim assistance, and customer support contacts for the Esteem II; explore sewing communities for additional help and advice.
Finding the Official Manual Online
Locating the official Singer Esteem II sewing machine manual online is a straightforward process, ensuring you have access to detailed instructions and diagrams. Begin by visiting the official SINGER website – singer.com – and navigating to their support section. Utilize the search function, specifically entering “Esteem II manual” or the machine’s model number for precise results.
Many third-party websites also archive older manuals; however, prioritize the official SINGER source for accuracy. Download the PDF version for convenient offline access. Ensure the manual corresponds to your specific Esteem II variation, as slight differences may exist. Online sewing forums and communities often share links to manuals as well, providing an alternative resource if needed. Always verify the document’s authenticity before relying on its instructions.
Warranty Information and Claims
Understanding your Singer Esteem II’s warranty is crucial for protecting your investment. Typically, SINGER offers a limited warranty covering defects in materials and workmanship for a specified period, often one year from the date of purchase. Retain your original proof of purchase – receipt or invoice – as it’s required for any warranty claim.
To initiate a claim, visit the official SINGER website and navigate to the warranty claims section. Follow the provided instructions, which usually involve completing an online form and potentially shipping the machine for inspection. Note that the warranty doesn’t cover damage caused by misuse, accidents, or unauthorized repairs. Carefully review the full warranty terms and conditions on singer.com.
Singer Customer Support Contact Details
For dedicated assistance with your Singer Esteem II, SINGER provides multiple avenues for customer support. You can reach their support team via phone during business hours; check the official SINGER website – singer.com – for the most current contact number. Alternatively, explore their comprehensive online help center, featuring FAQs, troubleshooting guides, and downloadable manuals.
SINGER also offers support through email and live chat, providing personalized assistance with your machine. Social media channels, like Facebook and Twitter, can also be used to connect with SINGER support. When contacting support, have your machine’s model number and serial number readily available to expedite the process.
Online Sewing Communities and Forums
Beyond official support, a wealth of knowledge exists within online sewing communities and forums dedicated to SINGER machines, including the Esteem II. Platforms like SewingSupport.com and various Facebook groups offer spaces to connect with fellow enthusiasts, share tips, and troubleshoot issues.
These communities are invaluable for finding solutions to specific problems, discovering creative techniques, and learning from experienced users. Many forums feature dedicated threads for older models like the Esteem II, providing access to archived information and advice. Participating in these online spaces can significantly enhance your sewing experience and provide peer-to-peer support.