
Keter Storage Box Instructions: A Comprehensive Guide (Updated 12/16/2025)
Welcome! This guide, updated today – 12/16/2025 – offers detailed instructions for assembling your Keter storage box. We’ll cover everything from unboxing to weatherproofing, ensuring a durable and organized storage solution for your needs.
Keter has become a leading global innovator in resin-based household and garden storage solutions. Their products are renowned for durability, practicality, and stylish design, offering a wide range of options to suit diverse storage needs. From compact boxes for seasonal items to large-capacity sheds for garden equipment, Keter caters to both indoor and outdoor storage requirements.
These storage boxes are constructed from high-quality, weather-resistant materials, making them ideal for protecting belongings from the elements. Keter boxes are designed for easy assembly, often requiring minimal tools and effort. The company provides comprehensive user manuals and online resources to guide customers through the setup process.
Whether you’re organizing a garage, patio, or garden, a Keter storage box provides a secure and convenient solution. Their diverse models, like the Borneo and Store It Out Max series, offer varying capacities and features. Understanding the specific model you’ve purchased is crucial for a successful assembly, and this guide will help navigate that process effectively.
Unboxing and Inventory: What’s in the Box?
Carefully unpack your Keter storage box, avoiding the use of sharp objects that could damage the components. Begin by laying out all the parts on a protected surface – a drop cloth or cardboard is ideal. Refer to the parts list included in your user manual; this is essential for verifying you have everything needed before starting assembly.

Typically, you’ll find the box’s base, side walls, lid, and lid-supporting mechanism. Hardware, including screws, bolts, and potentially connecting clips, will be packaged separately. Don’t discard the packaging until you’ve confirmed all parts are present.
Pay close attention to smaller components, as these are easily misplaced. The Keter Borneo series, for example, includes support beams. The Store It Out Max may have components for bin storage. A missing part can halt the assembly, so a thorough inventory is a critical first step. Document any discrepancies immediately and contact Keter support if necessary.
Tools Required for Assembly
Successful Keter storage box assembly relies on having the right tools readily available. While some models require minimal tools, a few essentials will significantly streamline the process. A Phillips head screwdriver is almost always necessary, and a power drill with a Phillips head bit can dramatically speed things up – use a low torque setting to avoid stripping screws!
A rubber mallet is incredibly useful for gently tapping panels into place, especially during base and wall construction. For certain models, like those with reinforcement beams, a level ensures a stable and square structure. Measuring tape is helpful for confirming dimensions and alignment.
Gloves are recommended to protect your hands, and safety glasses are always a good idea. While not always required, a wrench set might be needed for specific bolt sizes. Avoid using excessive force; let the tools do the work. Having these tools prepared beforehand will make the assembly process much smoother and more enjoyable.
Preparing Your Workspace
Before you begin assembling your Keter storage box, proper workspace preparation is crucial for a smooth and efficient build. Choose a flat, level surface – ideally concrete, patio stones, or a well-protected garage floor. This prevents instability and ensures accurate alignment during construction. Clear a spacious area, at least the dimensions of the assembled box, to allow for easy maneuvering around the components.
Protect your flooring with a drop cloth or cardboard to prevent scratches or damage. Organize all the parts and hardware, referencing the inventory list from the unboxing stage. Having everything readily accessible saves time and frustration. Ensure adequate lighting to clearly see the assembly instructions and small parts.
Finally, consider having a helper, especially for larger models, as some panels can be unwieldy to manage alone. A well-prepared workspace sets the stage for a successful assembly experience.
Step-by-Step Assembly: Base Construction
Begin by identifying the base panel – typically the largest, solid piece. Position it with the intended bottom side facing down. Locate the side panels designated for the base perimeter; these often have pre-drilled holes or slots for connection. Align the first side panel with the base, ensuring a flush fit.
Using the provided screws or snap-fit connectors, securely attach the side panel to the base. Repeat this process for the remaining base side panels, forming a rectangular frame. Double-check that all connections are tight and aligned before proceeding. Some models may include corner reinforcements; install these now for added stability.
Ensure the base is square by measuring diagonally from corner to corner – the measurements should be equal. A solid, well-constructed base is fundamental to the overall structural integrity of your Keter storage box.
Assembling the Walls
Now, with the base constructed, begin attaching the wall panels. Identify the front, back, and side wall pieces – they may differ in size or feature openings for handles or lids. Align the first wall panel with the base frame, ensuring the edges are flush and any pre-drilled holes correspond.
Secure the wall panel using the provided screws or snap-in connectors. Work your way around the perimeter, attaching each wall panel to both the base and adjacent panels. Pay close attention to the alignment, as misaligned walls can compromise the box’s stability and lid functionality.
Periodically check for squareness as you build upwards. Some Keter models feature interlocking wall panels; ensure these are firmly engaged. Once all walls are attached, gently test their stability before moving on to the lid mechanism installation.

Installing the Lid Mechanism
With the walls securely in place, it’s time to install the lid mechanism. This typically involves attaching hinges or a gas-lift system, depending on your Keter model. Locate the pre-drilled holes on both the lid and the wall panels designated for hinge placement.

Align the hinges carefully and secure them with the provided screws. Ensure the hinges move freely after installation, allowing for smooth opening and closing of the lid. For gas-lift systems, attach the piston to the designated points on the lid and the box’s rear panel, following the specific instructions for your model.
Double-check all connections to guarantee the lid operates safely and efficiently. A properly installed mechanism will prevent the lid from slamming shut and provide easy access to your stored items.
Attaching the Lid
Now that the lid mechanism is installed, carefully position the lid onto the assembled box structure. Align the lid with the walls, ensuring it sits flush and evenly on all sides. This step requires precision to guarantee a secure and weatherproof closure.
Depending on the Keter model, you may need to snap the lid into place or secure it with additional screws or clips. Refer to your specific user manual for detailed instructions on this process. Once the lid is attached, test its opening and closing functionality.
Verify that the lid operates smoothly and locks securely. If any adjustments are needed, loosen the hinge screws slightly and reposition the lid before tightening them again. A properly attached lid is crucial for protecting your stored items from the elements and ensuring the longevity of your Keter storage box.
Reinforcing the Structure: Adding Support Beams
For larger Keter storage box models, particularly those designed to hold heavier items or withstand significant weather conditions, reinforcing the structure with support beams is highly recommended. These beams, often included in the hardware kit, add crucial stability and prevent warping or collapsing over time.
Locate the designated slots or mounting points within the box’s interior walls. Carefully insert the support beams, ensuring they are securely fastened with the provided screws or clips. Distribute the beams evenly throughout the box to provide uniform support.
This step significantly enhances the box’s load-bearing capacity and overall durability. Always consult your model’s specific instructions for the correct placement and attachment method of the support beams. A well-reinforced Keter storage box will provide years of reliable service.
Understanding Different Keter Storage Box Models

Keter offers a diverse range of storage box models, each with unique assembly requirements and features. Recognizing these differences is crucial for a successful setup. The Borneo series, known for its large capacity, often involves a more complex assembly process with additional support beams.
The Store It Out Max, designed for storing bins, typically features a simpler construction focused on robust base support. Meanwhile, the Easy Box prioritizes quick and straightforward assembly, ideal for smaller storage needs.
Always refer to the specific manual included with your purchased model. These manuals detail the unique parts list, step-by-step instructions, and any model-specific considerations. Ignoring these distinctions can lead to improper assembly and compromised structural integrity.
Keter Borneo Series Assembly
Assembling the Keter Borneo series, with its substantial 416L capacity, requires careful attention to detail. Begin by laying out all components and referencing the included manual – a 3.26MB PDF is often provided; Focus first on the base construction, ensuring a level foundation for stability.
Wall panels connect via a tongue-and-groove system; apply even pressure during assembly. Reinforcement is key with this model; diligently install the provided support beams to prevent warping or collapse under heavy loads.
Pay close attention to the lid mechanism installation, ensuring smooth opening and closing functionality. Secure all screws firmly, but avoid over-tightening. Double-check all connections before adding weight. Proper assembly guarantees years of reliable outdoor storage.
Keter Store It Out Max Assembly
The Keter Store It Out Max is designed for versatility, accommodating garden tools, furniture, or even two 240L wheelie bins. Assembly begins with the base, ensuring it’s on a level surface. The large panels interlock, requiring firm but gentle pressure to connect securely.
Unlike some models, the Store It Out Max benefits from a robust construction, but proper alignment of the walls is crucial. Pay specific attention to the lid supports; these are vital for smooth operation and preventing strain on the hinges.
Refer to Keter’s online assembly guides for visual assistance. Once assembled, consider adding a padlock for enhanced security. This all-purpose box offers substantial storage, making careful assembly a worthwhile investment for organized outdoor living.
Keter Easy Box Assembly
The Keter Easy Box lives up to its name, offering a straightforward assembly process. Begin by identifying all components using the included parts list – download the PDF manual online if needed. The base snaps together easily, forming a solid foundation.
Wall panels connect via a simple interlocking system; ensure each panel clicks firmly into place; Focus on aligning the hinge points correctly for a smooth lid operation. The Easy Box is lighter than some Keter models, making it manageable for one-person assembly.
Consult the downloadable assembly instructions for detailed diagrams. While robust, the Easy Box benefits from being placed on a level surface to prevent wobbling. This compact storage solution is perfect for smaller spaces and quick organization.
Maintenance and Care Tips
Prolong the life of your Keter storage box with these simple maintenance practices. Regularly clean the exterior with mild soap and water to remove dirt and debris. Avoid abrasive cleaners, as they can scratch the surface. Inspect the lid mechanism periodically, ensuring smooth operation and tightening any loose screws.
For prolonged outdoor use, consider applying a UV protectant spray to prevent fading and cracking. Check for any signs of water ingress, especially after heavy rainfall, and address promptly. Avoid overloading the box beyond its stated capacity, as this can strain the structure.
During winter months, store the box in a sheltered location if possible, or cover it to protect against harsh weather. Proper care ensures years of reliable storage!
Troubleshooting Common Assembly Issues
Encountering difficulties during assembly? A common issue is misaligned panels – double-check you’re using the correct parts and following the diagram closely. If screws are difficult to insert, ensure you’re applying even pressure and using the appropriate screwdriver. Forcing screws can damage the plastic.
If the lid doesn’t close properly, verify the lid mechanism is correctly installed and adjusted. Sometimes, slight adjustments to the hinges can resolve this. Missing parts? Refer to the inventory list and contact Keter customer support for replacements.
Remember to review the assembly instructions again, paying attention to detail. Don’t hesitate to seek assistance online through Keter’s support resources or instructional videos. Patience and a methodical approach are key to a successful build!
Weatherproofing Your Keter Storage Box
Protecting your belongings from the elements is crucial. While Keter boxes are designed for outdoor use, extra steps enhance weather resistance. Ensure the lid closes tightly, creating a seal against rain and snow. Inspect the seams for any gaps and consider using weatherproof sealant along the edges for added protection.
Elevate the box slightly off the ground using Keter’s base or wooden slats to prevent moisture buildup and improve airflow. Avoid storing items directly on the box floor; use a tarp or pallet. Regularly check for and remove any debris that could trap moisture.
For prolonged exposure, consider a waterproof cover. Proper ventilation and elevation are key to preventing mold and mildew. Maintaining a dry interior extends the life of both the box and its contents!
Securing Your Storage Box: Lock Options
Protecting your stored items requires a robust security solution. Keter storage boxes typically feature pre-drilled holes for padlock attachment, offering a basic level of security. Choose a high-quality, weatherproof padlock with a hardened steel shackle for optimal resistance against cutting and corrosion.
For enhanced security, consider a locking handle kit specifically designed for Keter boxes. These replace the existing handles with lockable versions, providing a more integrated and secure solution. Remember that the level of security should match the value of the stored items and the risk of theft in your area.
Regularly inspect the locking mechanism and padlock for signs of wear or tampering. Consider anchoring the box to a solid surface, like a concrete pad, to prevent it from being moved or stolen. A secure box provides peace of mind!
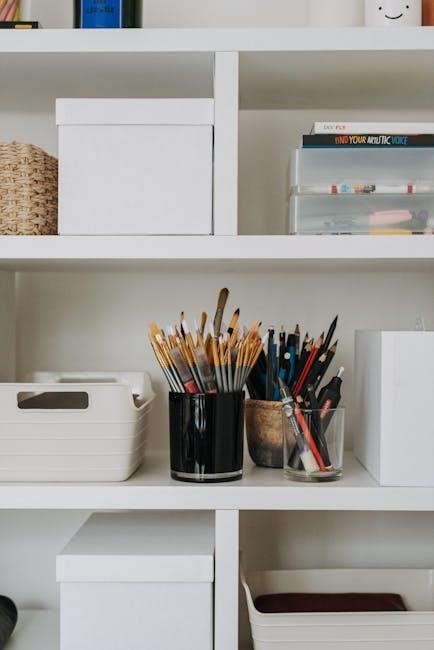
Maximizing Storage Space Within the Box
Efficient storage starts with smart organization. Utilize vertical space within your Keter box by employing shelving units or stackable containers. These maximize capacity, preventing items from being buried and forgotten at the bottom.
Consider using clear storage bins to easily identify contents without rummaging. Labeling bins is also crucial for quick access. For seasonal items, store heavier objects on the bottom and lighter ones on top. Don’t waste valuable floor space!
Hang tools or gardening equipment on the interior walls using hooks or pegboards. Regularly declutter and reorganize to maintain optimal space. Remember to distribute weight evenly to prevent instability. A well-organized Keter box extends its usability and protects your belongings.
Keter Storage Box Dimensions and Capacity Guide
Choosing the right size is key! Keter offers a diverse range of storage boxes, from smaller units like the Easy Box to larger options such as the Borneo 416L and the Store It Out Max, capable of holding two 240L wheelie bins. The 870L / 230 US GAL model provides substantial storage.
Always consult the product specifications before purchase. Dimensions vary significantly; ensure the box fits your intended space. Capacity is often listed in both liters (L) and US gallons (GAL). Consider what you plan to store – garden tools, furniture cushions, or seasonal decorations – to determine the necessary volume.
Accurate measurements prevent disappointment! Refer to Keter’s official website or user manuals for precise dimensions and weight limits. Proper sizing ensures stability and maximizes the box’s utility.
Where to Find Additional Resources & Support
Need extra help? Keter provides a wealth of resources to support your assembly and maintenance efforts. Start with Keter’s official website, where you’ll find downloadable assembly instructions for all models, including the Borneo, Store It Out Max, and Easy Box series. These guides offer step-by-step visuals and detailed explanations.
For quick assistance, explore Keter’s online assembly guides, designed for a smooth setup experience. If you encounter issues, consult the troubleshooting section within the user manual or on their website. Keter’s support team is also available to address specific concerns.
Don’t hesitate to reach out! Check for frequently asked questions (FAQs) and consider searching online forums for community-based solutions. Keter’s commitment to customer satisfaction ensures readily available support.